

Switch between locations
Each shop has its own phone setup. Here's how to move between them.
Every screen in the app shows one location at a time. The location you're working on is shown at the top of the sidebar, under your organization's name.
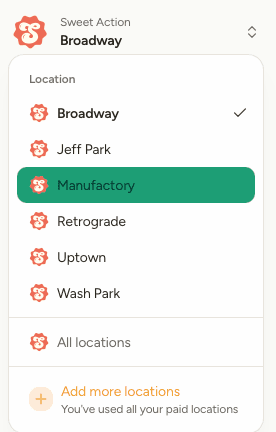
Change location
Everything you see afterwards — numbers, lines, menus, phrases, voicemail and call history — belongs to that location.
See all locations at once
Choose All locations to look across every shop. The day-to-day screens — Summary, Call history and Voicemail — then cover your whole organization, and list screens add a Location column so you can tell the rows apart.
Setup screens behave differently. You can look at every location's numbers, lines, menus and phrases together, but anything you create has to belong to one shop, so pick a location first.
Add a location
Select Add more locations at the bottom of the list. If it says you've used all your paid locations, raise the number of locations on the Billing tab first.
Team members only see the locations they've been given access to, so the switcher is shorter for them than it is for you. See Team members.